

In this week's episode of Onboard Lifestyle we take advantage of the summer-like weather to really crank out a few projects on our custom 435 catamaran SV ba...
Closed Captions (CC):
[Music]
good morning welcome back Jesse basic
it's kind of nice weather's change was
raining yesterday and I'm looking at the
forecast we have ten days it looks like
of no rain I heard birds chirping this
morning the seasons are changing fast
we're actually going to have
record-setting temperatures coming up in
a few days from now so that means we're
gonna get a lot done on SD basic so
let's jump aboard and see it we're in
for
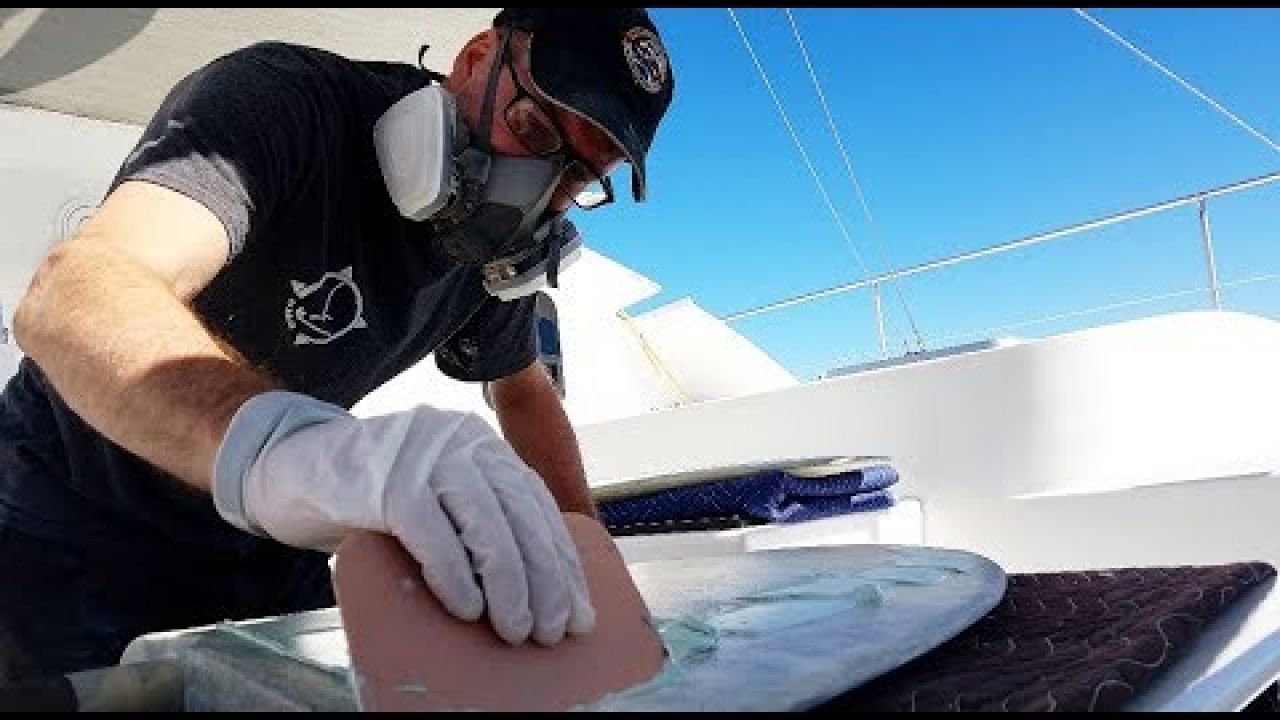
look at this the rudders
this was the last little bit of glass
where a guide to do I'll trim this up
sand this down and these are ready for
fairing barrier coat and bottom paint
and we're done
these cassettes I got a little work left
I'm starting to build this ends up
there's a little bit of damage on these
so making sure those are nice and clean
we'll sand these up one last time get
glass on those and those will be ready
for fairing Oh a lot to do before we
haul out less than two months now but
look at that the sun's trying to burn
through these clouds and once it does go
up nice weather to get a ton of work
done so let's get going okay I want to
get these rudders set aside they're
about done all I need to do is just trim
this loose glass off and to do that
let's take a sharp razor and just run it
right along the edge take a little piece
of sandpaper
Mehcad can sand this down really
carefully and hide the seam right on
that radius be real careful you're not
burning through anything I mean the
whole goal of this was to get protection
on this and these edges are so
vulnerable I just keep working it down
until it's smooth
okay that didn't take long at all
alright fifteen twenty minutes and look
at this it could run your hands over
this just smooth as can be and that seam
is hidden right on this radius okay
this rudders ready for fairing compound
now work this one over and get on to
those cassettes okay now that I felt
good about the rudders let's get you up
to speed on these rudder cassettes okay
remember when I was taking these apart
there was a little bit of gap but a
quarter-inch maybe a little bit more gap
so what I'm doing is taking core mat
this is core mat here and I've laminated
a piece on top on bottom and that's
gonna give this cartridge probably about
an eighth inch more height which should
take up most of that gap this core mat I
just cut out a couple pieces here and
laminated them in now I'm gonna shape
them in with thick and epoxy you know I
need to do that first before I lay my
glass cloth because I want the glass
cloth to sweep up and over this and just
make this all one solid piece I still
need to fair the other side so I'll
shape this and fare the other side at
the same time cam just filling this in
with west system
with a colloidal silica which is their
4:06 product
just kind of shaping this in I need to
get this real close this is very
difficult to sand
so the smoother I get it the better
okay now that I've shaped these in with
my thickened epoxy
I'm going to go through and look at
these little teeny gouges and little
imperfections I'm gonna try to just
smooth some of this side out there's a
little Ridge here that we have my glass
cloth will lay down much flatter without
any voids behind it I'll just go through
work this over for a while and get this
just a little bit smoother I'm not too
concerned about making this real pretty
under need to fair this afterwards this
is all this whole piece gets buried
inside the hole at the end I just want
to make sure it's sound
[Music]
[Applause]
[Music]
it's nice to have these just camping out
here I'm not touching those again tell
fairing just spent the better part of a
couple hours sanding these down just
want to make sure the surface is in good
condition so I could start laying the
glass cloth I am putting a lot of extra
work onto these ends this is where those
nylon bushings for the rudder posts land
so I had been building these up and
shaping these in I'm gonna start
layering class cloth on that and I will
pay attention more to these ends as I
start shaping this in but let's get this
class cloth down so this will cure
overnight okay it's a real irregular
shape and I want to do two different
pours one from this side fold it over
down to this bottom edge and then I'll
flip it tomorrow fold it up to this edge
so this whole perimeter will have two
layers and each face will have one man I
wish I grabbed the camera just earlier
chills run around and I can see why he's
laying up cloth right now on these
cassettes and they're kind of difficult
just because there's lots of little
bends on them and the sun's hitting it
in the Sun City I'm trying to get this
all down before it fires off and that
one took me about 20 more minutes than I
thought it would it hasn't fired off yet
but it was close do you need any help
no I got it now I got it now but I guess
gotta work at a faster pace on this one
you notice how I asked to or I offer to
help you after after here no way still
got one to go
you were running fast but I would be
probably cursing or something you don't
curse
I quit curse
but it looks good there
okay I'm not gonna lie that layup was
fun
and why it was is because I I tried to
tackle quite a bit all at once this face
this edge that edge this edge this edge
lapping it over folding everything
around and all the way around these are
pretty intricate shapes and I did it
with a 205 partner so it was I had
probably a 25 minute working time and
these took me about 20 minutes to get
that to fold down so I was humping it to
get this finished off but they're both
done I'm kind of babysitting them right
now until they start to far off make
sure nothing kicks up I don't want any
bubble starting and some of these really
crazy areas like this right here so I
just sit here with my little cards and I
just kind of make sure these are all in
place want wait for this to fire off
should be a few more minutes
okay we'll check on this in the morning
see how they look I was inside a minute
ago heard of the crash so I came out
here thinking I don't know what I was
thinking like a goose hit the boat
Canadian geese are all around right now
it was a big crash beautiful morning
something looking around the decks
trying to find anything then I look up
there's the culprit
a bald eagle he came in hot
so fast look at this you broke our wind
indicator jerk
hey buddy
and then even paying attention to me
he's bending the whip antenna now
oh well pretty majestic animal I'll let
him stay
looks like a beautiful day though
let's get to work it's a new day nice
and calm
sun's out we're gonna get a lot done
look at these cassettes laid that glass
on last night it's fully cured I'll be
able to trim these ups and these up and
get the cloth on the other side these
look much flatter than they did remember
that big hump that was on here let's
sight down this now let's look at the
sheen of the Sun see look at that you
could barely see my insert now that's
gonna work out nicely
these should ride in those trunks much
smoother now we'll get those in and
mount them permanently so my goal today
get these flipped over sand these out
and get some cloth on we'll start with
that
okay got all that trimmed off now we'll
just sand the smooth and I'm ready for
glass
okay just spend about an hour maybe 15
minutes sanding these out cut them all
wrapped around nicely and remember I ran
this wild right up this edge by oh you
know dying off my glass cloth right on
this sharp radius when you sand it it
just goes right away now when I lay this
one over it'll come down and I'll die it
off on this edge and then I'll stay on
that away that way I get a nice layer of
cloth here here and a double layer here
with a nice two inch overlap okay got
the cloth all cut using a 10 ounce cloth
on these cassettes this is the last
layer that I'm putting down so I'll
check back in in about an hour takes
about a half hour
percocet to get this to lay down right
and I'll show you how I did okay let's
take a look at these just finished this
one it's still a little wet this one's
starting to fire off now on the Sun here
let's take a look at this it's all
wrapped around nicely this is the last
layer of cloth on here we'll get this
curing today and I will trim this up
sand it tomorrow but for now we got to
get out of here
got an appointment this morning so we
got a lot of stuff to do in the next one
of them is let's count out a new head
sail yeah our head sail is old or it's
stretched out looks like something from
water
actually it does they said that too so
there's a lot of great sale lofts here
in Seattle and we're going this morning
to meet with nor sale and just talk with
them a little bit see what they have to
offer so this is exciting it's another
step getting us closer to you know to
feel like it makes it really real it
does unless you want to keep our old
sale keep it from this tell Jenna hey
baby we'll take a picture that was new
blanket so let's head on over there see
what they have to say
[Music]
and then it has this taken
before we there's also another track
exactly is shorter compared to the
height of the sail whereas if we do a
Genoa which is a sail that overlaps the
mass or those for their app then that's
a lower aspect say and that produces
lower loads whereas the high aspect is
going more straight up and the highest
loads are between the head and the clew
of the sail so we have to handle those
for ice and I would assume sail material
plays that they roll that yes in what in
what it can handle so
webbing at the head attack
raccho ruler and
but smaller and tighter
and then
this has the briefie patches so you see
how this patch out and beyond Rolly
marks right I'm afraid we have to redo
our mains are you trying to tell me
something
but sales have changed in the last 10
years so we have to be at home work oh
ok we got nice weather look at this
right next to fisheries we'd better go
shopping I need some epoxy
you got everything you needed kind of I
can afford a sale now spending all your
money I know right okay I think
you think yeah thanks better than it
ending up all over the ground I'm gonna
be on your blog I know okay so what a
lot of you guys don't know is I actually
do most of the epoxy
on board but today I'm thinking it's
time to turn the reins over to teal and
let him do this layup so he is going to
be laying up you're gonna watch it lay
up fast because it's hot in here right
now this is a learning opportunity for
you we gotta move fast cuz it actually
is pretty warm which is weird because
it's only about 55 degrees out but the
sun's beating on this and it just warms
up so it's kicking huh yeah I can kick
now the epoxy yeah I just gotta move
quick I've got a lot to do here in the
next few minutes all right well in the
meantime I'm going to stay here and wait
for him to tell me when I needs more
epoxy
and enjoy a little Rosie
[Music]
nice dehydrated
let's get them
let me know if you need more epoxy so
yesterday my dad laid down the glass in
the sugar scoops and my mom was
supervising me so he's working right now
and we're gonna go check out to see what
so I think he did a pretty good job you
can see right here hey a plus for me now
that these are all sanded out
I need to drill a hole back in here
where their rudder shaft goes through
it's a two inch hole it goes in right
here I'll show you how I do that
[Music]
[Music]
[Applause]
okay let's see how now on that search
there right in nicely now that these are
bored out I notice in here these are
fiberglass tubes but they look a little
dry in there so before these go back in
the water I'm gonna put another coat of
epoxy on the inside and to do that Lynne
came up with this idea to straighten out
one of my roller cages and I could reach
way in here look at this and all this
work my way out
ingenious
[Music]
okay last night I put my second coat on
the interior of these cassettes and then
went through with some thickened epoxy
and touched up any little Nick's or
defects in my glass work and I spent an
hour to this morning sanding them out
these are done no more epoxy work the
rudders are done no more epoxy work that
means the only thing left is faring well
a barrier coat and bottom paint but
bearing is next i use a 3m product there
3m platinum i like it because it's
really lightweight it flows out smooth
it's a little expensive but it's really
easy to work with when I did these
rudders I really paid attention to keep
this glass work as flat as possible I
mean here's a transition see right here
you can't feel it so it's not gonna take
much fairing at all most of the fairing
is just gonna be getting you know this
little bit of stipple that you feel from
the glass cloth so what I'll do is skim
coat these really lightly with that
fairing compound it's not gonna take
much
I'll get Lynn to help she'll mix up the
faring compound as I'm applying it it's
a warm day so it's gonna go fast
let this one dry fire off here in about
a minute or two just a thin layer maybe
1/32 of an inch thick
most of this product will be sanded off
let's get the next one set up here
don't really take a break
I like this I like this new routine yes
yo perfect perfect
okay spent about 20 minutes you can see
on this after about 20 minutes if I was
putting on this product thicker and I'm
trying to go over an uneven surface I
would be using long sanding borders but
since my substrate was so flat all I'm
doing is filling in just the grain of
the clock so I'm able to use an orbital
sander a mess
[Music]
okay it's that easy
this first face is done you can see all
I did was fill in than Carina the glass
everything else came out perfectly
smooth and this feels just smooth is
convenient
okay I'll just keep repeating I'll flip
this over do that side sand this one up
and just keep going until I feel good i
stuff to do the edges and the tops it's
like a little ways to go
we have things turning out real nice
that's the last side iced up a little
bit of details on the edges but these
are turning out as good as they could
get they just feel smooth as can be here
you know I'm sure that a lot of people
don't have comments about sanding
fairing compound with an orbital sander
and you could never get it flat but I'm
telling you I've had enough practice
with this I'm really happy I did that
same method on a thousand square feet of
decks and look at these suckers all done
with Norville
I'm not suggesting everybody use Oh
Norville takes a lot of practice but for
me it works
get this once and it up a little more
details and I'm ready for barrier code
getting excited
looks like you guys are getting a sneak
peek of the barrier coat that my dad
puts on next episode
he also tackles a pretty big project in
remember if you liked the video don't
forget to leave a like and subscribe you
really like this check our patreon page
below from right next to see
see you then
Onboard Lifestyle ep. 56 Rudder Repairs On Our Catamaran (Part 3)
Uploaded by:
Onboard Lifestyle
•
Category:
Boat Building/Maintenance/Repair, Instructional
•
Added on
22 March 2019
Description
In this week's episode of Onboard Lifestyle we take advantage of the summer-like weather to really crank out a few projects on our custom 435 catamaran SV ba...
Closed Captions (CC):
[Music]
good morning welcome back Jesse basic
it's kind of nice weather's change was
raining...
Closed Captions (CC):
[Music]
good morning welcome back Jesse basic
it's kind of nice weather's change was
raining...